
How to transfer GoDaddy domain to Cloudflare [Step-by-step]
Updated Aug 31, 2024
I couldn’t find any update-to-date tutorials, so I thought I’d document what I did.
Follow this and you’ll transfer your GoDaddy domain in hours rather than wait 5 to 7 days.
Why transfer a domain from GoDaddy to Cloudflare?
GoDaddy is the biggest domain provider in the world. But if like me, you have realised the domain renewal fee at GoDaddy is much higher than you can get at Cloudflare, you’re at the right place. Here are the steps I did to transfer a domain from GoDaddy to Cloudflare.
Disclaimer:
Consider the relevant downtime if you have a live website.
GoDaddy and Cloudflare offer different services, read more about the differences if you are not sure if you should switch.
Not all domains are supported by Cloudflare, check the list of supported TLDs if you’re not sure.
How long does it take?
Transferring a domain from GoDaddy can take up to 7 days, but there are steps you can take to make it happen quicker. It took me only a few hours from start to finish.
There a few hoops that GoDaddy make you jump through, once I got through these steps, my domain was transferred right away. Follow my step-by-step, any questions let me know in the comments!
Step 1 - Locate your GoDaddy domain
Login to GoDaddy to confirm your domain details. You can find your domain under My Products page. Copy the domain address to avoid any typos.

Step 2 - Add Site in Cloudflare
Login to Cloudflare, in your dashboard, click Add Site, paste in your domain address, click Continue.
If you don’t have a Cloudflare account yet, now is the time to sign up for an account.

Choose your plan: I chose the free plan.
Review your DNS records: I didn’t change anything.
Change your nameservers: Keep this page open, go back to GoDaddy.
Step 3 - Change nameservers on GoDaddy
Before doing any changes, it might be a good idea to save your DNS settings, in case you need them.
From your GoDaddy domain, click on Manage DNS, click Nameservers, on this page you will see the current nameservers being used, e.g. xxx.domaincontrol.com.
Click on Change Nameservers. A pop-up will appear. Now go back to Cloudflare.

Copy the nameserver from Cloudflare, and paste into GoDaddy. Do this for both nameservers.

In the GoDaddy pop up, select “I’ll use my own nameservers”. Paste each Cloudflare nameservers into each text box, to replace the GoDaddy nameservers.
Once you’ve copied and pasted both nameservers from Cloudflare to GoDaddy, click Save.

GoDaddy will ask if you are sure you want to change the nameservers, click Continue.

It will take a couple of minutes for GoDaddy to update the nameservers.
Head back to the Cloudflare page where you copied the nameservers from.
Scroll down to click Continue.
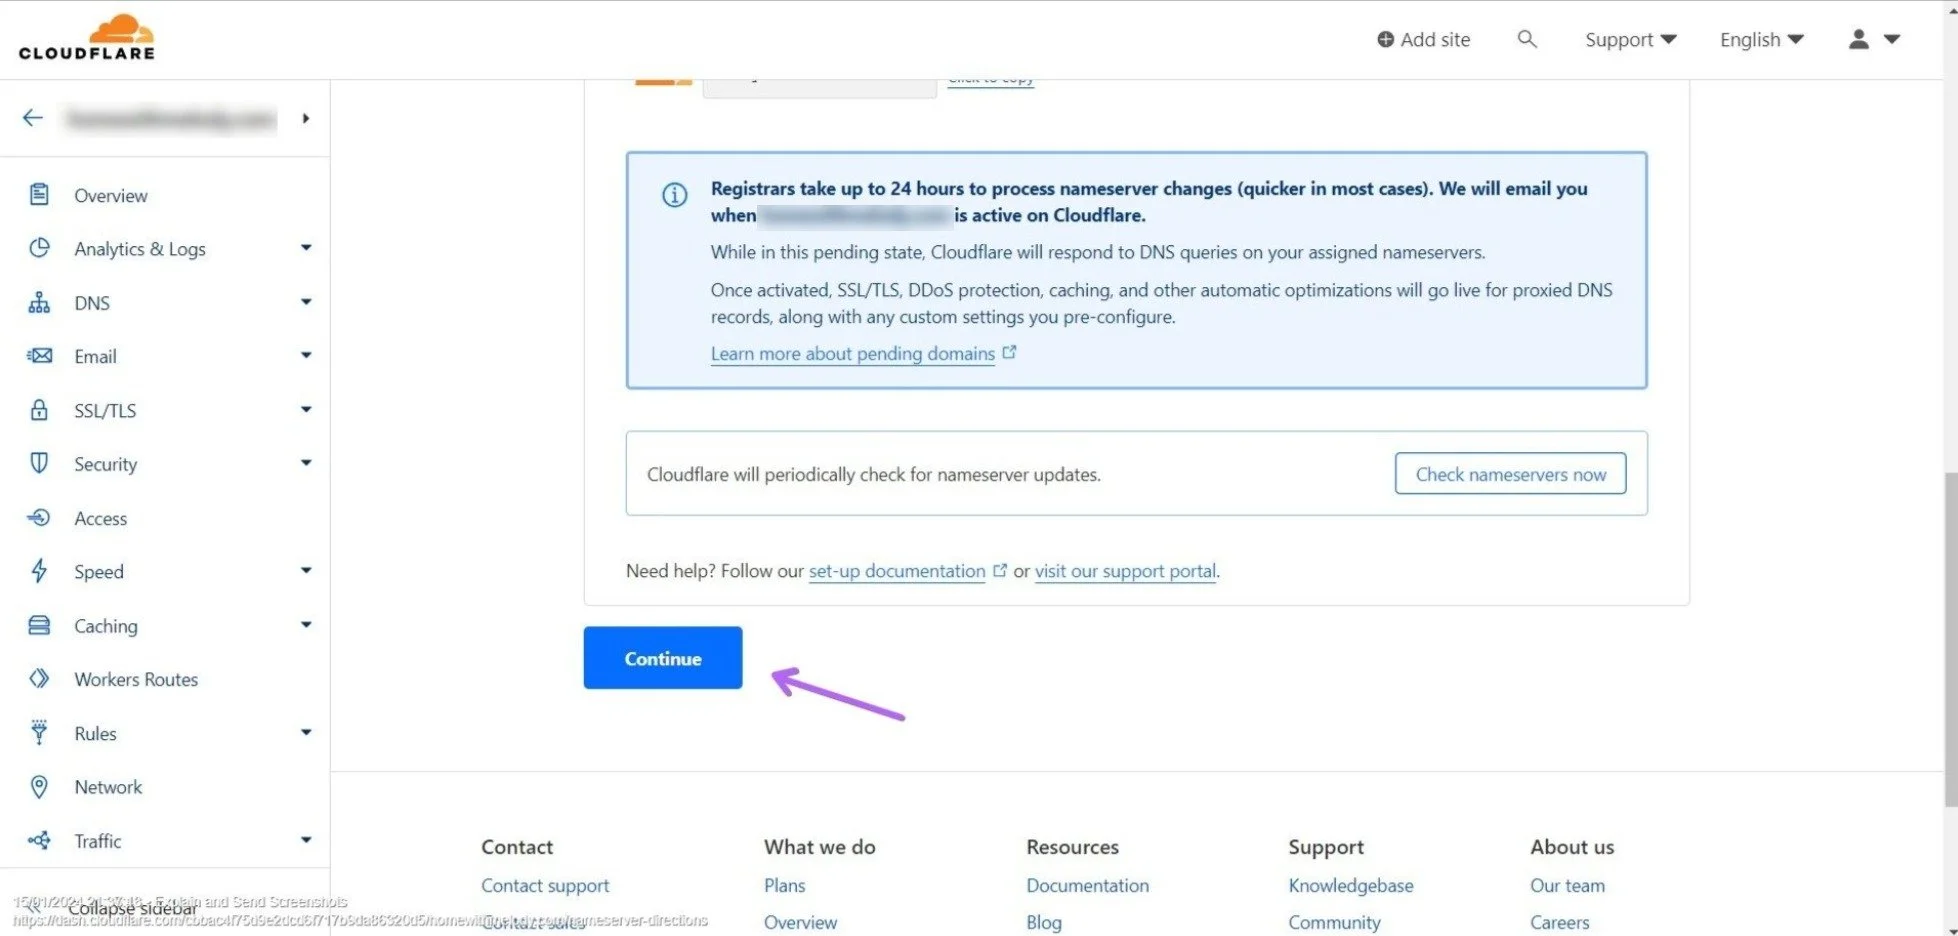
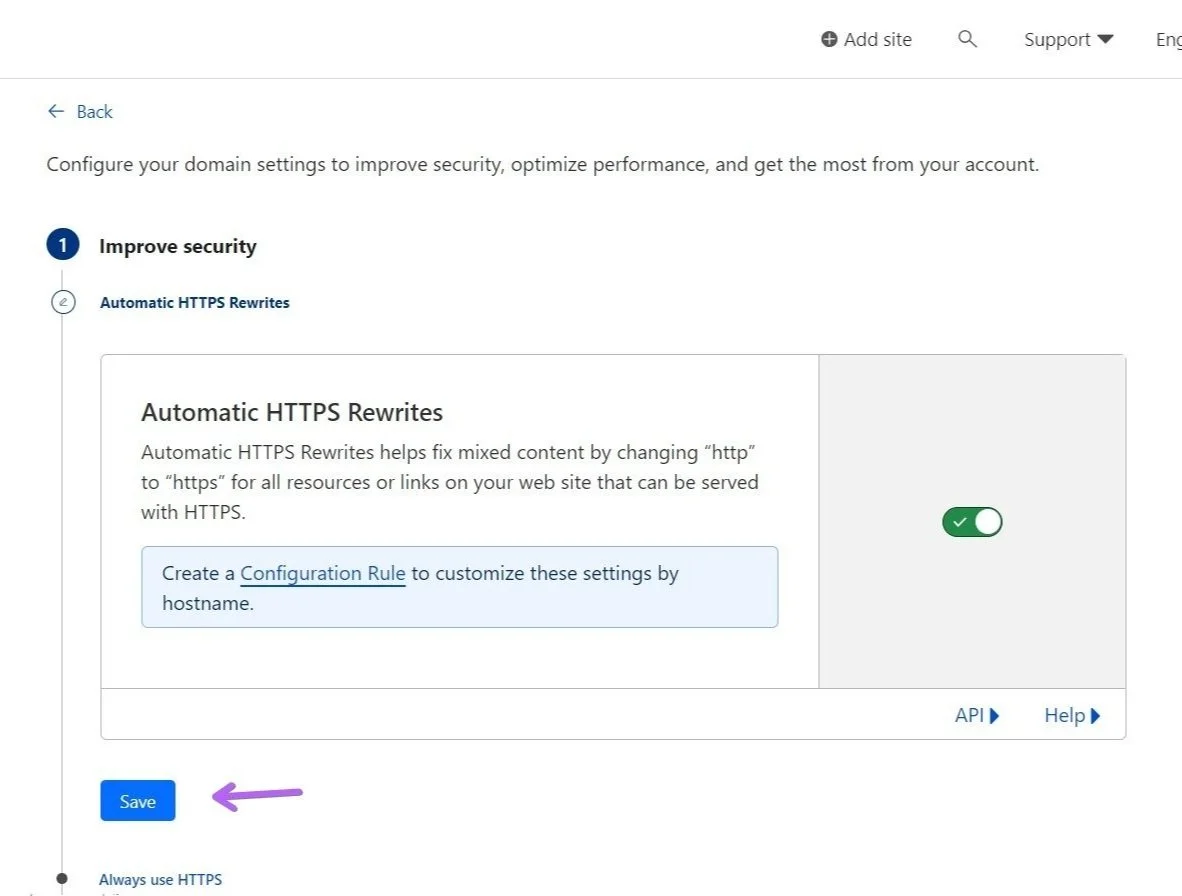
This will bring you to the Quick Start Guide. Click Get started.
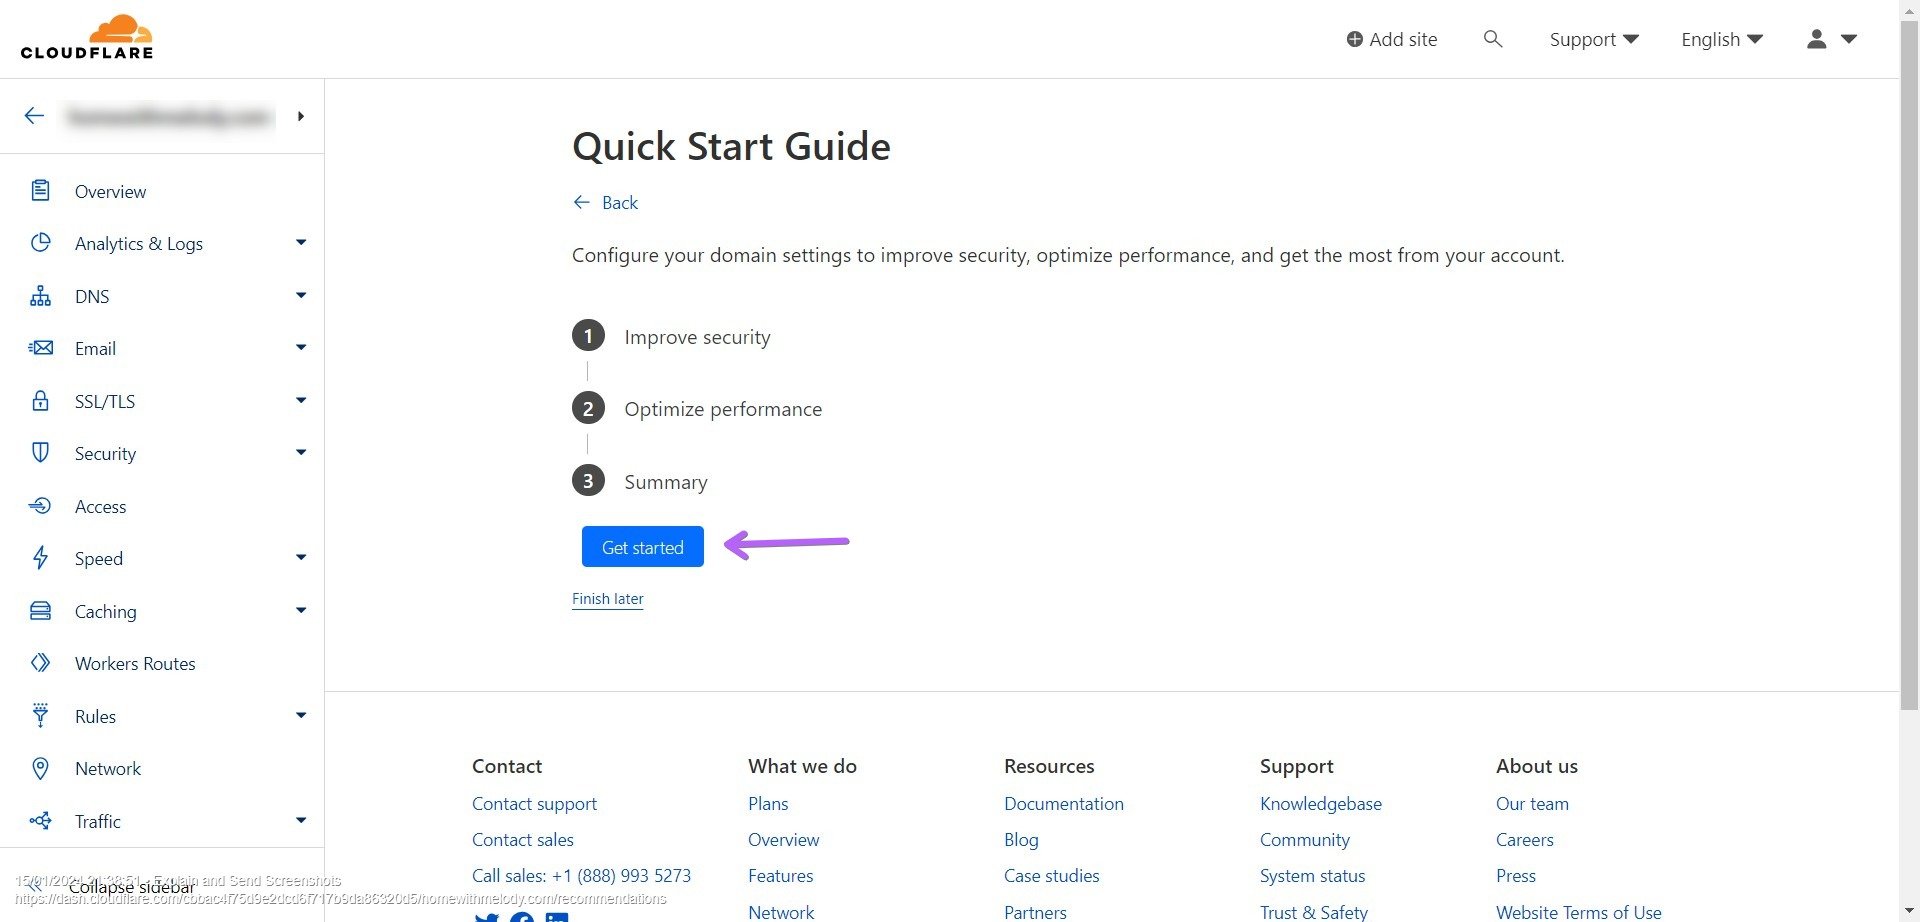
Go through and review the settings as appropriate for your domain. Save for each setting.
When you get to the end, click Finish.

After finishing the above steps, GoDaddy should then remove the old nameservers, and update them with the Cloudflare nameservers which you have added.
Refresh the Cloudflare page to check the status. For me, it took about a minute, and I got the following page after refreshing.
Great news! Cloudflare is now protecting your site

Check the nameservers have also updated in GoDaddy.

Step 4 - Unlock domain transfer from GoDaddy
Important! Before you can request Cloudflare to transfer your domain, you will need to tell GoDaddy that you want to transfer to another registrar.
On your GoDaddy page, click on Overview tab for your domain, scroll to the bottom. Under Transfer, find and click on Transfer to Another Registrar.
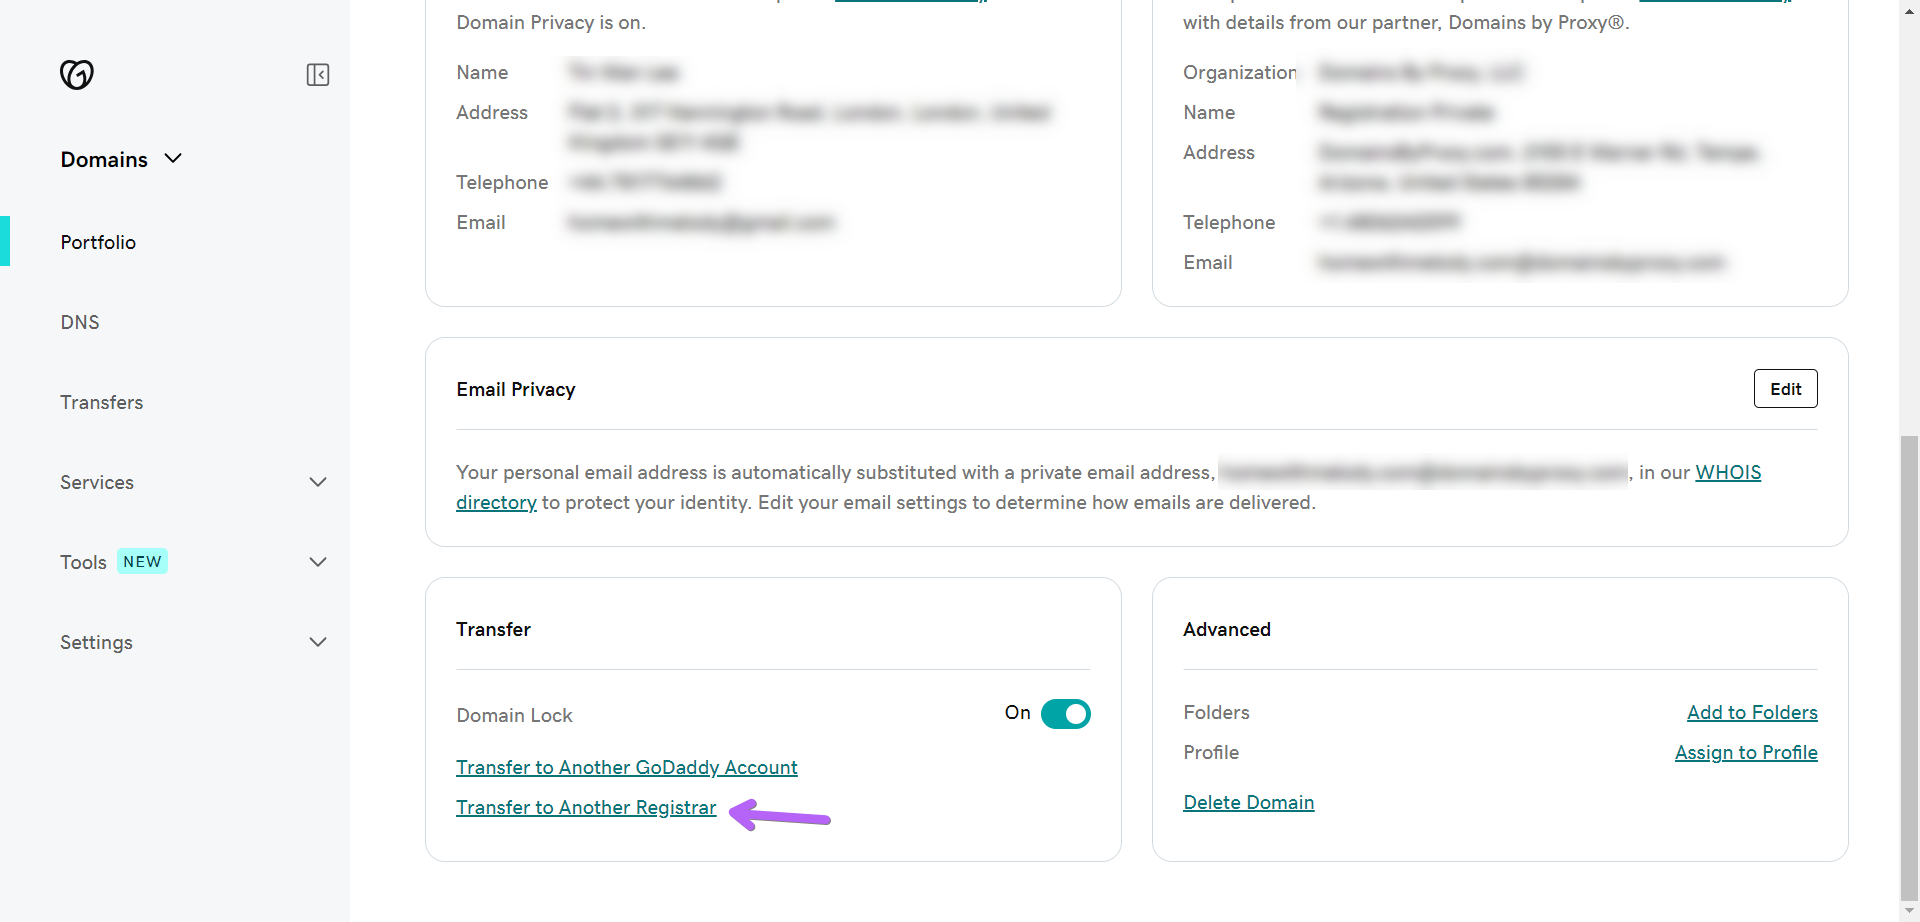
You will come to the Domain transfer checklist page. Click Continue with transfer to unlock the domain for transfer.

Your domain is now unlocked from GoDaddy and ready to transfer.
To initiate the domain transfer to Cloudflare, you will need the Authorisation code from GoDaddy.
Click to copy the Authorisation code. This should also have been emailed to you.

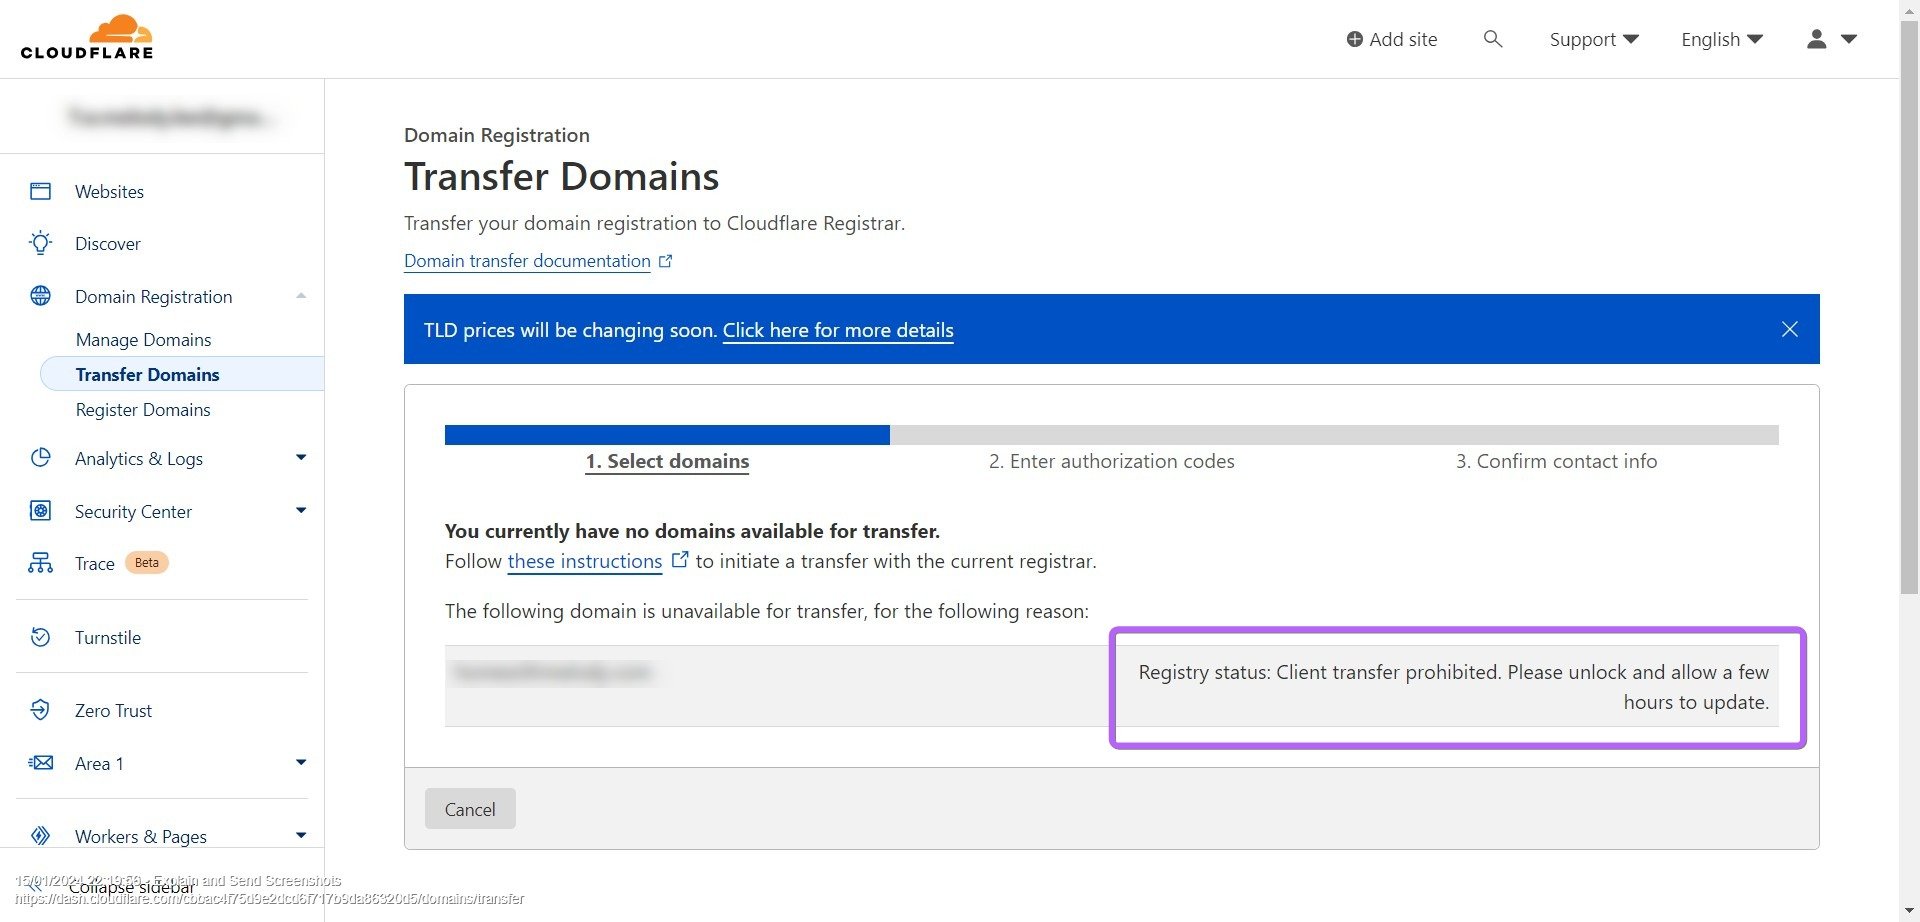
Step 5 - Initiate domain transfer to Cloudflare
If you have just unlocked the domain for transfer in GoDaddy, you might see this message.
Registry status: Client transfer prohibited. Please unlock and allow a few hours to update.
You will have to wait until this change is reflected in Cloudflare to continue. I waited just under an hour before I could proceed.
To complete the domain transfer to Cloudflare. In your Cloudflare account dashboard, click on Transfer in your dashboard menu.
Select the domain to transfer to Cloudflare (I only have one in the screenshot).
This step will require a payment method in your Cloudflare account. If you haven’t already, set up a payment method.


Paste in the Authorisation code you got from GoDaddy. You can get the Authorisation code either from the GoDaddy page or in an email from GoDaddy.
Click Confirm and Proceed to continue.

The next page asks you to confirm your contact details for your domain’s WHOIS record. Fill in as appropriate and click Confirm and Finalise Transfer.
Finally, your transfer is happening! EXCEPT one last thing…

Step 6 - Approve domain transfer in GoDaddy
This step is the difference between waiting up to 7 days or a few minutes to complete your domain transfer from GoDaddy to Cloudflare.
If you don’t do anything, GoDaddy will automatically approve your domain transfer between 5 - 7 days. Or you can manually approve the domain transfer in GoDaddy.
To approve the transfer of your domain from GoDaddy to Cloudflare, click Transfers, click Transfers Out, select your domain from the list, and click Approve Transfer.

Might have to wait a couple of minutes, but then you will see that your domain is no longer in GoDaddy.
Domain transfer complete
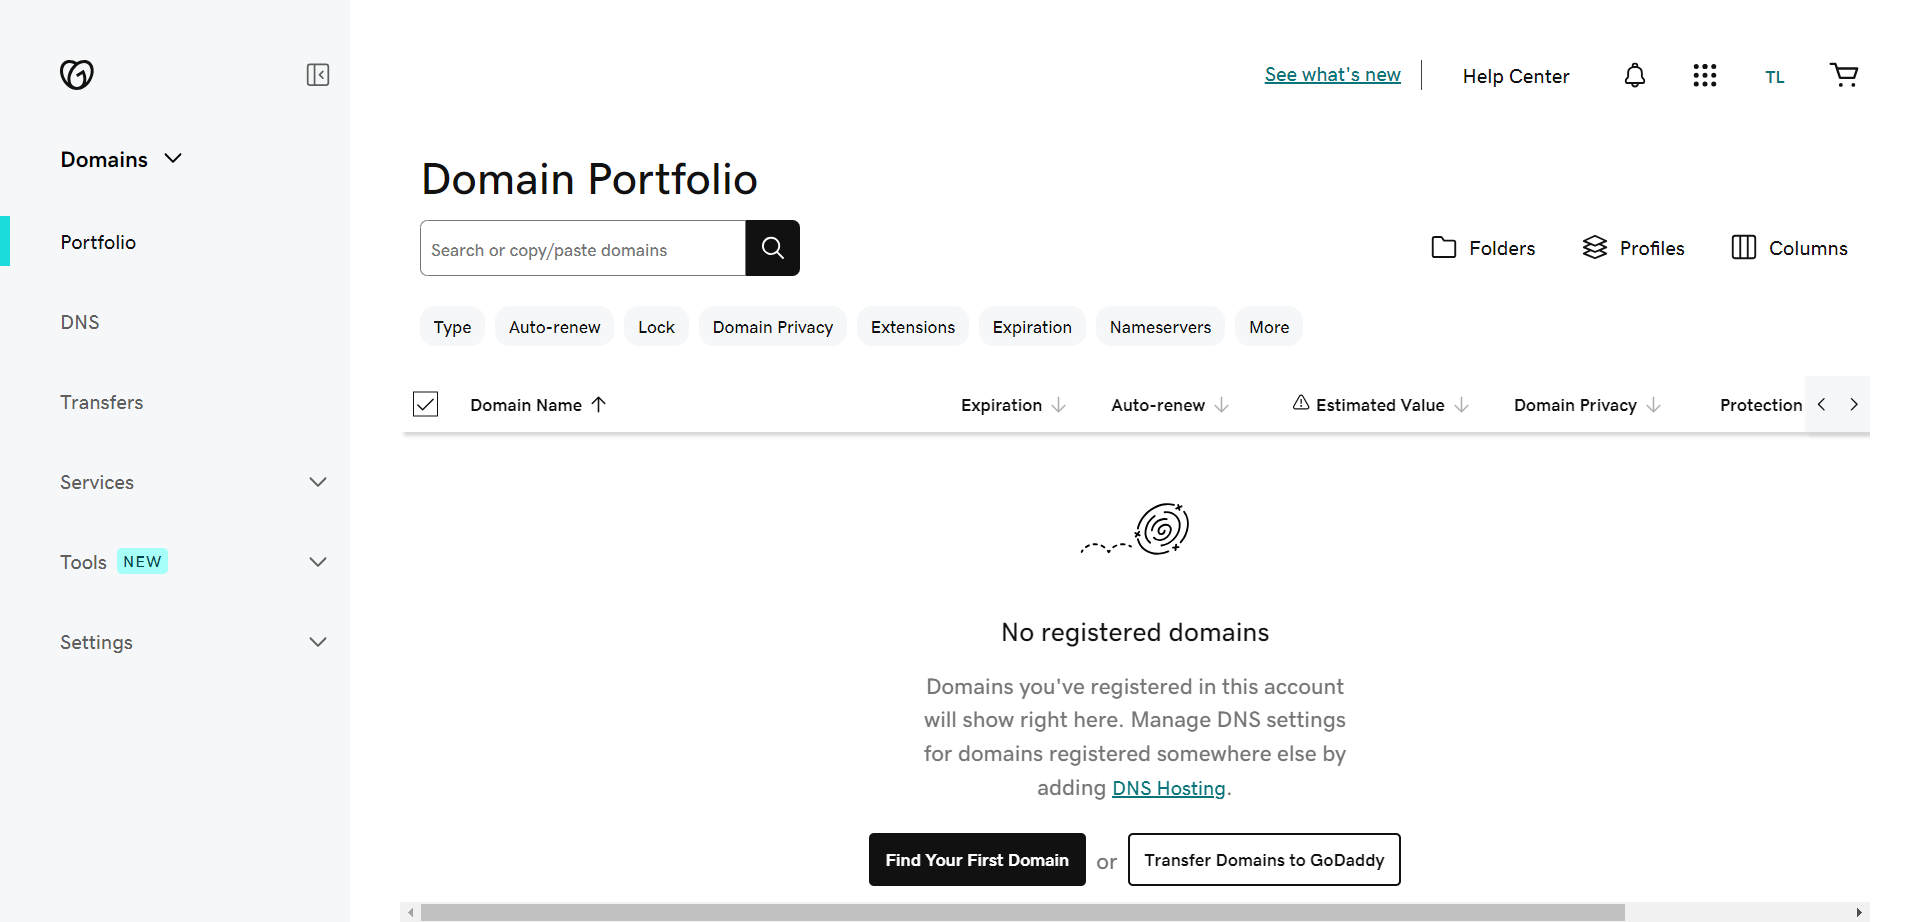
Check your Cloudflare dashboard to see if the domain you’ve transferred from GoDaddy has taken place. Under Domain Registration, Manage Domains.
Ta-da! Your domain should now be under your Manage Domains in Cloudflare.

Did I help? You can support me by sharing my post or consider ☕buying me a coffee☕ :) Thank you, happy building.
#neverstoplearning
Need my help?
Over a decade in tech, 10+ Squarespace websites worked on in the last 12 months, 100+ website owners helped including on the Squarespace Forum.

Or